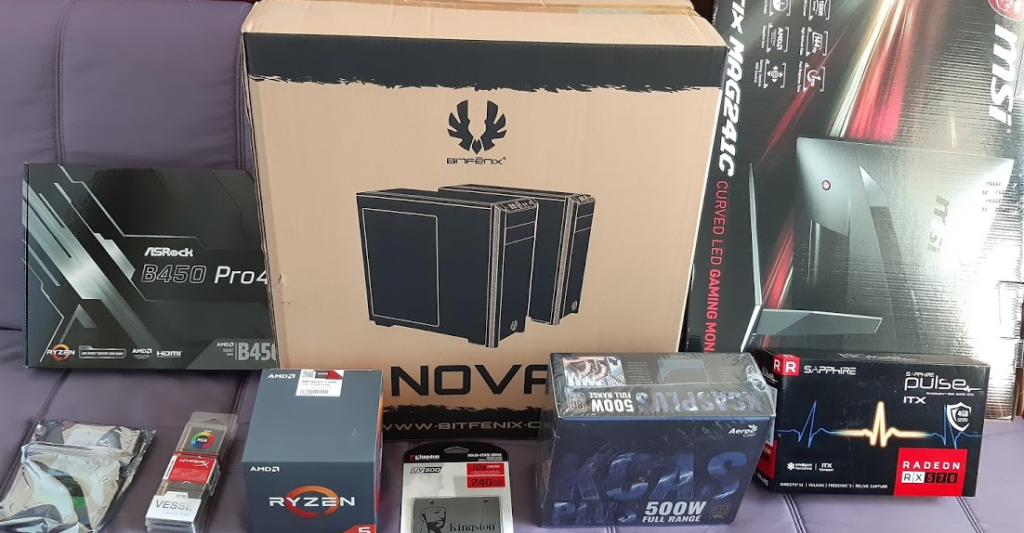
Бюджет клиента: +- 700 евро без монитора
Задача клиента: игры, рендеринг видео, работа в фотошопе, пк на будущее с запасом
Итог по сумме без сборки: 974,23 евро

Бюджет клиента: +- 700 евро без монитора
Задача клиента: игры, рендеринг видео, работа в фотошопе, пк на будущее с запасом
Итог по сумме без сборки: 974,23 евро
Сначала нужно поставить бесплатную программу Sandboxie https://www.sandboxie.com/
Затем разлогониться на приложении Viber на ПК, если он залогинен.
Запустить Viber в Sandboxie и авторизироваться — таким образом приложение будет запущено в песочнице. После этого запустить Viber уже обычно без песочницы и авторизироваться через второй телефон или через вторую симку (если есть такая возможность). После этого будет запущено две версии Viber на компьютере.
Для того, чтобы запустить два Viber на одном телефоне
Нужно, чтобы телефон был двухсимочный.
На примере телефона Samsung — дополнительные функции — двойной профиль приложений — там можно будет выбрать Viber, если он установлен
Intel i3-6100 (Skylake) — мой текущий процессор. Он для бюджетной игровой сборки.
Хочется по-мощнее камень для игр, поэтому остановился на Coffee Lake i5-8400. Сейчас его цена — 202 EUR. Сделаю себе подарок на др 🙂
Второй вариант, который рассматриваю, это AMD Ryzen 2600, всё таки иметь 6 ядер и 12 потоков — это даже с запасом и это круто!
Необходимо выбрать материнскую плату под это дело. Ну и если уж делать апгрейд, то и SSD нужен новый также будет.
Если под Intel:
материнские платы 300-серии: имеют чипсеты Z390 , Z370, H370, B360, H310
Вариант с самым дешёвым чипсетом H310 я сразу отбрасываю.
Что мне нужно для моей материнской платы?
Достаточно один слот для видеокарты,
желательно минимум 3 слота для подключения вентилятора,
нужно обязательно 4 слота для RAM.
идеально, чтобы было качественные фазы питания
хочу ATX форм-фактор
Поддержка разгона на будущее было бы неплохо. Если учитывать последний пункт, то лучше брать чипсет Z370. Но здесь будет кусаться цена. Учитывая, что проц я беру не разгоняемый сейчас, лучше взять по качественнее вариант с более простым 360 чипсетом.
Что такого в версии Z?
Можно разгонять процессор с индексом К, можно разгонять память выше 2666 MHz, больше разъёмов, можно создать RAID — на H370 тоже, есть поддержка SLI.
Если рассматривать вариант с B360 чипсетом — это может стать золотой серединой,
можно взять
ASUS B360-Plus TUF Gaming
100,16 EUR
или ещё другие варианты подумать.
Минимальные цены материнских плат с B чипсетами от разных вендеров:
MSI B360
68.98 min
Asrock B360
65.64 min
Asus B360
71.70 min
Gigabyte B360
68.35 min
Если говорить об AMD, тогда нужно брать B460
приглянулась такая от Asrock — B450 Gaming K4 цена её 91,04:
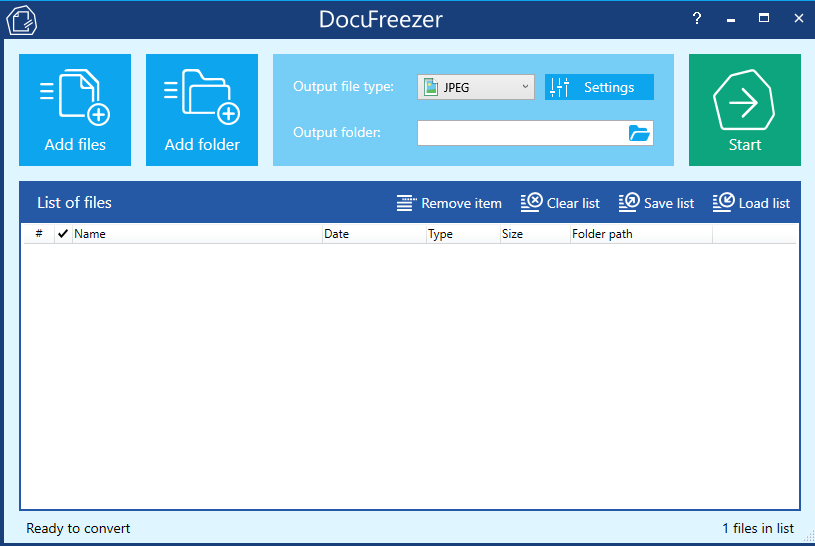
Если понадобится установить на PC программу для конвертации, то может пригодится программа DocuFreezer. Она бесплатная, но оставляет сбоку надпись о своём присутствии
для быстрой конвертации pdf в jpeg подойдёт. умеет также конвертить в png, text, tiff,
Исправление линков на картинки после переезда
взято отсюда: http://www.inmotionhosting.com/support/edu/wordpress/migrating-wordpress-inmotion-hosting/correct-image-links
Correcting image links after a migration
Log into your cPanel interface.
select phpmyadmin tool. Once inside the cPanel, find the Databases category and click on the phpMyAdmin tool icon.
select new databaseю You are now on the main phpMyAdmin page. Find the newly added database and click on its name from the left-hand sidebar. Our sample database is named testdb.
select database tableю This opens the database and the screen refreshes with a list of the tables. Using the sidebar again, find and click on the wp-posts table (or similar).
click the SQL button. Look to the top of the screen and you will see several tabs that run across the page. Click on the SQL tab.
enter the SQL code and run it.
You are now on a MySQL editor screen. In the code area, copy the following bit of MySQL.
UPDATE wp_posts SET post_content=(REPLACE (post_content, »,»));
Be sure to replace with the old sitename and with the new site name. For instance, our original site was inmotiontesting.com and the new test site will be at test.inmotiontesting.com so the code should appear as below:
UPDATE wp_posts SET post_content=(REPLACE (post_content, ‘inmotiontesting.com’,’test.inmotiontesting.com’));
Click on the Go button to run the code and change the URLs for all images in the posts. This will also affect any other ‘hard coded’ links that were in the posts that pointed to the original site.
Below are before and after shots of the changes made. Note that the image paths are displayed in the lower left hand corners of the images. You can see how they switched to the new sitename after the SQL code ran.
Заблокировать ylmf-pc exim
статья с сайта — http://unixa.ru/korotko-o-glavnom-./blokiruem-ylmf-pc-na-exim.html
статья частично переделана под свои нужды!
Блокируем Ylmf-pc на Exim, BruteForce атака
02:04:2015 г.
Ylmf-pc достаточно известный «нейм», с которого идёт постояннный подбор (Brute Force) авторизации на e-mail серверах. IP разные, поэтому блокировать по IP бесполезно. В логе:
# less /var/log/exim/mainlog | grep ylmf-pc видны следующие записи:
Открываем конфигурационный файл Exim: # vi /etc/exim.conf
идём сюда
acl_smtp_rcpt = check_recipient
acl_smtp_data = check_message
и ниже добавляем строчку, чтобы получилось так:
acl_smtp_rcpt = check_recipient
acl_smtp_data = check_message
#my new fix
acl_smtp_helo = custom_begin_smtp_helo
далее опускаемся в
######################################################################
# ACLs #
######################################################################
и после # ACL that is used after the RCPT command
и добавляем
#my new fix
custom_begin_smtp_helo:
drop
condition = ${lookup{$sender_helo_name}lsearch{/etc/exim/heloblocks}{yes}{no}}
log_message = HELO/EHLO — HELO on heloblocks Blocklist
message = HELO on heloblocks Blocklist
accept
Сохраняем и перезапускаем Exim: # service exim restart
Т.о. мы добавили ACL проверки и при упоминании в файле etc/exim/heloblocks — ylmf-pc прерываем сессию. Смотрим, что в логе:
2017-04-17 12:56:32 H=(ylmf-pc) [82.165.75.246] rejected EHLO or HELO ylmf-pc: HELO/EHLO — HELO on heloblocks Blocklist
Цель достигнута!
я взял эту инструкцию отсюда — https://forums.virtualbox.org/viewtopic.php?f=1&t=48258
My attempt at a step by step.
1. Shut down VirtualBox, back up your <userdoc>\.VirtualBox\VirtualBox.xml file.
2. Find your existing «Virtualbox VMs» folder, and copy (not move) the whole folder with contents to your new drive E:
3. Run VirtualBox, then for each VM in turn :-
3.1 Right click the VM name and select «Remove» from the popup menu. Answer no to the «physically delete files?» question.
3.2 Select the Machine|Add.. menu item, navigate to the VMs new location on drive E:, and select the .vbox file.
3.3. Repeat for any remaining VMs.
4. In File|Preferences, set the default machine path to «E:\VirtualBox VMs»
5. Test each of the VMs. Only after you are sure they all work, delete the old VM containing folder, i.e. delete «C:\VirtualBox VMs».
Mikrotik router
router
IP — > DHCP Server — > Leases (покажет выданные адреса DHCP сервером)
IP — Firewall — > NAT — настройка правил файрвола на примере открытия порта 3389.
General — > Chain — dstnat, protocol 6 (tcp), Dst. Port 3389, In Interface pppoe-out1, action — > netmap + log , to Addresses 192.168.xx — локальный адрес, To ports — 3389
General — > Chain — srcnat, Dst. Address 192.168.0.0/16, Out Interface pppoe-out1, action — > masquerade
IP — Firewall — > Connections (покажет подключения, которые есть в данный момент)
Interfaces -> Interface покажет список портов.
R — есть линк,
RS — есть линк, порт в бридже (slave?)
S — нету линка
Для поднятия GRE Tunnel на MT
Interfaces — > GRE Tunnel — > add — > name любое,
local address наш ip, Remote address — ip куда создаём тунель, dscp — inherit, dont fragment — no
Напишу для надёжности и сохранности сюда, что собиралось 2016 год и получилось в итоге, может пригодится когда-нибудь.
CPU — Intel Core i5-6400
GPU — Geforce MSI960 4GB MSI Gaming
MB — MSI B150 Gaming M3
RAM — 8GB Samsung M378A5143EB1
HDD — Seagate ST1000DM003
PSU — OCZ Firepower CXS500W
CASE — Zalman Z3 Midi Tower
Compound — Arctic MX2 Thermal Compound
DVD — LG GH24NSD1
По всем компонентам цена получилась 708.05, удалось договориться о скидке и купить за 690EUR. Понравился корпус, возму на заметку. За 36,90 предлагают добротный корпус с 3 вентиляторами встроенными. Зачот! А клиент хотел изначально почти все те комоненты, что мы собрали, поэтому такая цена.
Для примера в орди вот такое продают за 850евро: Ordi Salsa Extra (6gen)
Intel Core i5-6400, 8GB DDR4, MB B150 kiibistik, VGA 2GB NVidia GTX960T DVI, HDMI, DP, HDD 240GB SSD + 1TB, DVDRW, ID+Flash kaardilugeja, heli- ja võrgukaart, korpus ATX 550W
цена завышена сильно, + неизвестно, что за модель материнки, 2гб видео хз тоже какого вендора, правда из плюсов ссд диск, но клиенту он не был нужен. Он изначально в орди и смотрел комп себе. Считаю, что экономия в 150евро очень существенна)
И на последок фото, что получилось)
всплывал баг, что при отключении флешки комп уходил в ребут принудительный.
решил проблему так, источник не помню
In my case, now this issue seems to work better in my system. And I think I solved this when I PERMANENTLY turned off Windows Defender (Microsoft?s antivirus) (take into account that Windows Defender is permanently monitoring the activity of the external drives and this can cause a malfunction when trying to unplug the pendrive).
To Turn Off Windows Defender (PERMANENTLY)
Look for gpedit.msc (type directly after opening the start menu) and run it as admin (secondary button). Then, enter system passsword and press Enter.
Go to Computer Configuration/Administrative Templates/Windows Components/Endpoint Protection.
In the right pane of Endpoint Protection in Local Group Policy Editor, double click/tap on the Turn off Endpoint Protection policy to edit it.
In the new window that will be opened, select (dot) Enabled, Apply and then click/tap on OK.
When finished, close the Local Group Policy Editor and Restart the computer.
Deactivating «Windows search» service for that device/pendrive (or any other external unit) is also highly recommended.
And, of course, remember to install another antivirus by your own (remember you have just permanently removed the by default protection of Windows Defender).
I think this can help you with the problem of the USB remove message. At least you can try this procedure in order to see if it works.
Hope it helps.
Regards.